
Checker boards make a great bold statement of color and design.
Here are a few tips for sewing and pressing a perfect checker board.
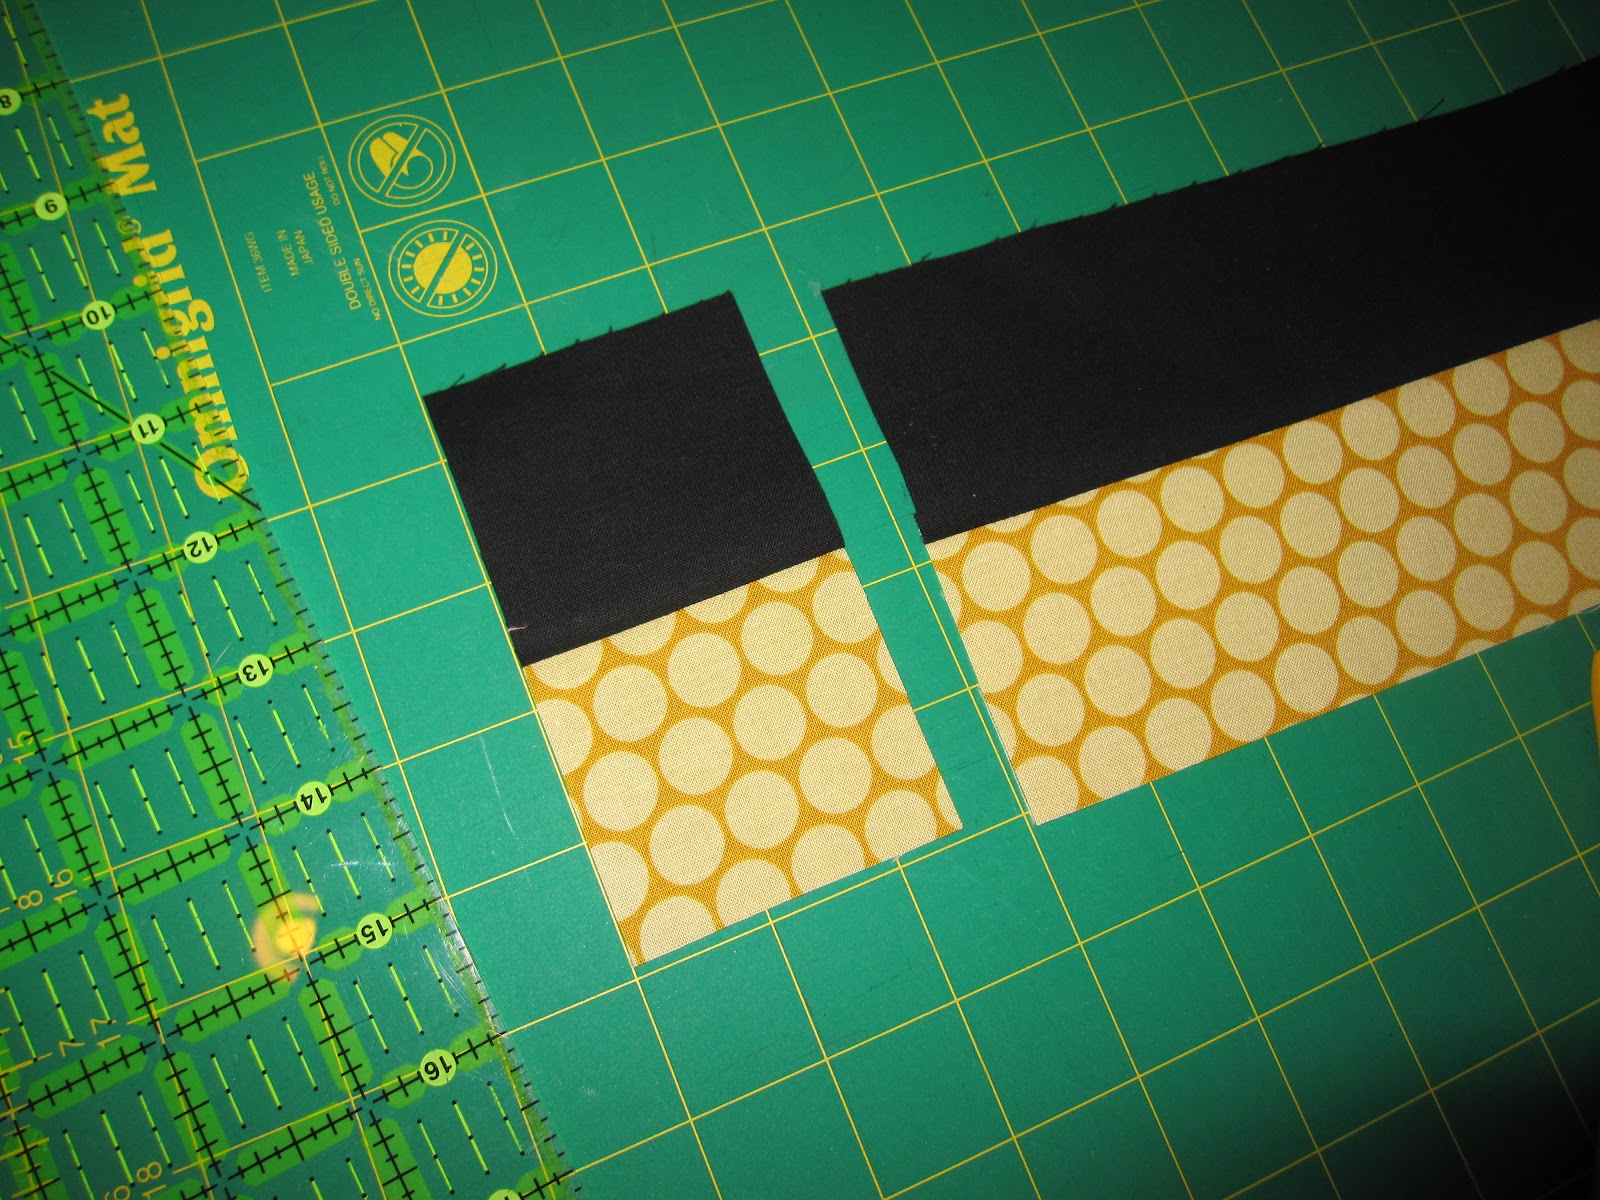
I started with two contrasting strips cut 2 1/2" WOF (width of fabric)
My checkerboard will finish with 2" squares.
In this case I used black and gold. For the greatest impact it is important to use high contrast colors.
I sewed the long sides of the strips together and checked to see that my pieced strip measured exactly 4 1/2".
That meant my seam allowance was exactly 1/4".

I squared up the edge and then sub-cut the strip into 2 1/2" segments.
So what's that blue tape on my ruler?
When cutting multiple segments I put a piece of blue tape on my ruler close to the line I need so that I don't get distracted and cut the wrong size!! Can you tell this has happened to me more than once?!
I then put these segments together locking the opposing seams in tight.
Feel that lock -- See that lock. Pin if you need to but keep those seams locked tight together.

I sewed them together for a perfectly matched intersection.
Almost done!
Next I pressed the seam from the wrong side to relax the thread and embed it into the fabric.

Which way does the seam go? It goes both ways?! Yup - watch.

I carefully released the initial stitching both sides of each intersection to allow the seams to press open in in the middle. Here's the right side --


Using just the tip of my iron I pressed each intersection open.

Then I turn everything to the right side and finished pressing the seams to one side or the other.
Result? Perfect Intersection!!

But Wait! One more test.
Each of my checker boards needs to measure 2" from seam to seam. Let's look.

Now that's a Perfect Checkerboard!!!!
Happy Quilting.
P.S. The quilt is at the quilter. It's called Beep! Beep! and is made with the Riley Blake Peak Hour line.
I'll post a picture as soon as the binding is on but here's a sneak preview -
